

Hydraulic Cylinders
Hydraulic Cylinders are the circuit elements that convert hydraulic energy into mechanical energy in the hydraulic circuit and obtain linear motion and force.
Hydraulic cylinders are used in the market in different types and sizes. Various hydraulic cylinders such as single acting, double acting, tandem and telescopic are used in different applications depending on the purpose of use.
The hydraulic cylinder type that we encounter most in the market is double acting single spindle cylinders. In the picture in Figure 1, an exemplary cylinder is seen. Although there are many different designations on the hydraulic cylinder in the market, the name of Hydraulic Cylinder is used in fluid power terminology.
Below is an exploded assembly image with parts found in a standard hydraulic cylinder in Figure 3. As it can be seen here, the part named as piston is the cylindrical part connected to the shaft in the hydraulic cylinder. Hydraulic cylinders are used in the market in different types and sizes. Various hydraulic cylinders such as single acting, double acting, tandem and telescopic are used in different applications depending on the purpose of use. The hydraulic cylinder type that we encounter most in the market is double acting single spindle cylinders. In the picture in Figure 1, an exemplary cylinder is seen. Although there are many different designations on the hydraulic cylinder in the market, the name of Hydraulic Cylinder is used in fluid power terminology.
In order for a hydraulic cylinder to perform its duty, it must absolutely be trapped in the pressurized oil. If the pressure loss occurs inside the cylinder as a result of internal or external leaks to occur and reaches a critical value, the cylinder may become unable to perform its function under the influence of these pressure losses. Sealing elements are used in various regions to prevent leaks that may occur in the hydraulic cylinder. The selection of seals produced from a wide range of materials and many types is made according to the construction and operating conditions of the hydraulic cylinder.
Operating conditions are a criterion in the selection of sealing elements and also cause the construction of hydraulic cylinders to vary. In Figure 4, there are 3 types of cylinders. These cylinders, designed for different working conditions, differ in the selection of both construction and sealing elements.
In single-acting double-spindle hydraulic cylinders, they move faster due to the difference in space, while moving slowly while returning with the same pump flow rate.
As it is known, hydraulic cylinders, which are also defined as linear motors, are hydraulic equipment that converts fluid's hydraulic energy into mechanical energy. Nearly all hydraulic systems ultimately drive a hydraulic cylinder.
No matter how accurate the selection of hydraulic unit equipment is made, we see that this choice corresponds to the job thanks to hydraulic cylinders.
Hydraulic cylinders designed and manufactured without paying attention to certain principles may not perform as desired during service.
As a result, the entire hydraulic system is affected and can cause major material losses. In this paper, the most frequently encountered problems during the design and production of hydraulic cylinders, the problems caused by these problems will be addressed and points will be pointed out by means of solutions.
PARTS FOR HYDRAULIC CYLINDERS
Picture 1. solid model cylinder picture
1.1. Sleeve (Cylinder Tube) Material is st 52-3 quality unless there is a special demand. The inner surface of the beehive is honed.
1.2. Rod (Shaft) Material can be manufactured from stainless derivatives, stainless steels in accordance with St 52 working conditions in the domestic market, Ck 45 in general. There is a movable, corrosion-resistant coating in the cylinder since it is in contact with the external environment during operation.
1.3. Front Cover (Cap) Material can be made of cast iron, ductile iron or non-alloyed manufacturing steels. The sleeve connection can be made as a screw or bolted connection. In addition to carrying the sealing elements, it also functions as a bearing.
1.4. Piston Material can be made of cast iron, ductile iron or non-alloyed manufacturing steels. It carries the sealing element that prevents internal leakage. It also serves as a bed.
1.5. Back Cover Material should be selected in St 52-3 quality in order to ensure compatibility with the sleeve. If not found, unalloyed steels with low carbon content should be preferred. The task closes the back part of the sleeve and carries the fastener on it.
1.6. Tie Rod End and Sleeve Head Material should be selected in st 52-3 quality in order to ensure compatibility with the sleeve. In addition to being produced as ready, there are also different connection types requested in the machine construction.
1.7. Sealing Elements will be explained in Chapter 4. Figure 1. 2D assembly image
HYDRAULIC CYLINDER TYPES
Hydraulic cylinders can generally be handled in three groups. These;
2.1. Single Acting Hydraulic Cylinders
2.1.1 Immersion Type Hydraulic Cylinders A
2.1.2 Hydraulic Cylinders with Reverse Weight. F
2.1.3 Spring Return Hydraulic Cylinders. to
2.2. Double Acting Hydraulic Cylinders
2.2.1. Single Rod Hydraulic Cylinders. A B
2.2.2. Double Rod Hydraulic Cylinders A B
2.3. Telescopic Cylinders
2.3.1. Single Acting Telescopic Cylinders A
2.3.2. Double Acting Telescopic Cylinders A B

3.DIRECTIONALITY IN HYDRAULIC ROLLERS
Hydraulic cylinders are complicated equipment formed by combining multiple parts. When the working conditions are examined, the parts that move back and forth are working on a single connection axis. For this reason, all the parts that make up the roller must be positioned on the same axis. Otherwise; · Axis differences mean that the roller runs leaning, which causes the seals to wear quickly. · Different axes also mean to transfer unwanted loads to the roller elements, as a result, the life of the roller elements is shortened. ·
If the cylinder is stronger than the strong chassis connection, it forces the machine's chassis and may cause deformation in the chassis. The system heats up quickly. The electric motor and pump are forced. As a result, unnecessary power losses occur and efficiency decreases. Now let's briefly examine the processing methods of the parts forming the cylinder and the details to be considered.
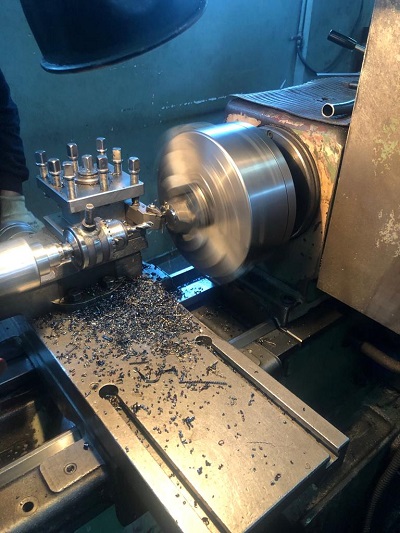
3.1. Sleeve Figure 2. The reference sleeve is always the inner diameter of sleeve productions. All the operations to be performed in the sleeve during the production are carried out with reference to the inner diameter. In addition, if the oil inlet union is welded, this process should be done before turning. Looking carefully at the picture, there is 101 size 1 mm larger than the sleeve diameter. This area is the seating area of the front cover, and if the post-weld ovality is exceeded, the inner diameter of the bucket should be treated at a time together with external extraction. Another point to consider when processing the diameter 101 dimension is the surface quality. Looking at the complete picture, the element defined as o-ring, which is one of the sealing elements, is deposited in this region. Surface quality and circularity prevent this sealing element from working properly. Looking at the size 100 in the picture, it is seen that the surface quality is desired in the order of rt <= 0.3 my. This surface is the surface where the piston seal and bearing elements work. If the surface quality is impaired, it may cause the internal leakage of the roller by reducing the life of the felt. In the market, these pipes can be supplied honed or ready to be honed.
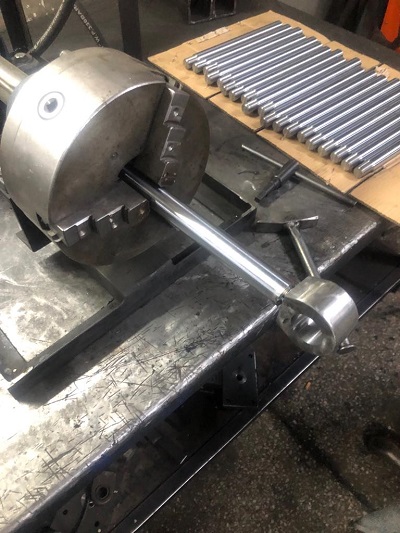
3.2. Tie Rod (Shaft) The surface working on the cylinder rods and the piston, the cushioning elements must meet the necessary concentricity tolerances. The chamfering shown as 20 degrees in the picture ensures that the sealing elements pass without damage during the assembly stage. If the rod is manufactured from a ready-made coated spindle, the outer surface must be protected during processing. When the rod is in bed, the entry of wood chips between the bed and the rod should be prevented and an apparatus should be used to prevent the bed from making a mark during the rotation.
3.3. Front Cover (Cap) The front cover, which is attached to the sleeve with various methods according to the construction principles, is one of the important processes of manufacture. Because the outer sleeve is in contact with the rod surface inside, the geometric tolerance deviations that may occur on the cover can risk the entire system, no matter how healthy the sleeve and the rod are manufactured. For this reason, the concentricity tolerance is very important in the region that places the sleeve and the region that places the bearing. In addition, the upright tolerance on the forehead is also important at the end of the stroke during the work. If there is a curvature on the forehead with respect to the axis, the piston front face tries to lean against the curve with the effect of pressure at the end of the stroke. It applies unwanted extra loads on different axes to flex the rod in the amount of curvature and the sealing and bearing elements of the piston. The front covers also accommodate the sealing elements. The surface quality of the channels where the sealing elements are installed directly affects the life of the elements. Itching in the ducts, the sets, the dimensions out of the tolerance are the direct cause of leakage. Hydraulic cylinder bearing elements are mounted on the front covers. If the front cover is made of non-alloy steel, it should never be in contact with the rod. In principle, two materials of the same property should not be brought into contact with each other. If this happens, there is a risk of abrasion and bleeding each other. For this reason, if the front cover is made of steel, a bearing element must be used. The materials used in the production of front covers do not have any calm in contact with the rod, aluminum alloy, pig, spheroidal derivatives and bronze alloy materials.
3.4. While carrying the sealing elements on the piston, such as the front cover, the geometric tolerance deviations that may occur in the piston may be at risk, regardless of how healthy the sleeve and the rod are manufactured since the inside of the outer sleeve moving in the outer sleeve is fixed. The issues mentioned on the front cover are valid in the piston.
3.5. The Back Cover is the element that covers the cylinder, and since it carries the cylinder back connection on it, the parallels between the two surfaces and the steep tolerances according to the invoice diameter of these surfaces have a considerable importance. The out-of-tolerance negativities that may occur in these areas will cause unwanted loads in the cylinder and construction, and will not even allow the assembly of the cylinder, as it will disrupt the cylinder connection axis. Our cover can also be manufactured in a healthy way, and welding operation is also a critical process if the cover is connected to the sleeve by welded jointing. If there is a distortion on the back cover during welding, the above-mentioned negativities will occur.
3.6. There are hundreds of connection types according to tie rod end and sleeve head construction. Regardless of the type of connection, basic machining and welding operations should be carried out to prevent axial deviations at the moment of connection. This type of manufacturing reduces the risk of error. However, voiding times are longer and material sizes increase.

3.7. Sealing Elements will be explained in Chapter 4.
FELT SELECTION IN HYDRAULIC CYLINDERS These are hydraulic cylinder elements that turn the cylinder off in itself, prevent oil leakage inside and outside the system and thus provide pressure formation. The choice of sealing elements is a process to be planned during the design phase. Wrong choice means a complete stop of a machine or a large plant, which clearly reveals its importance. The choice of cylinder sealing elements should be made considering the following conditions. Working pressure Production of impermeability elements is successfully carried out in our country. The product catalogs of our manufacturers contain sufficient information for design.
MATTERS TO BE CONSIDERED DURING INSTALLATION If all the cylinder parts that have been manufactured successfully are assembled by uneducated personnel, we will face the risk of going to empty. The points to be considered during assembly are given below as items.
All parts that are manufactured must be free from burrs. At this point, the most important areas that will not be skipped are oil inlet holes. The sealing elements mounted on the piston must pass through the oil inlet holes during assembly. If the holes are not rounded enough, the felt will be damaged during passage through that area and lose its function.
According to the geometry of the cylinder parts, cloth etc. It cannot be cleaned with materials. Screw outer bottoms, channels, and small holes can never be cleaned from oil and metal dust. For this reason, the most appropriate cleaning method is not to wash with suitable solutions in a closed environment under pressure.
The region where the cylinder assembly will be made should be a sterile environment away from the manufacturing area.
Metals such as sharp-head screwdrivers and knives should not be used while mounting cylinder sealing and bearing elements.These tests;
1.Pressure test
2.Inner leak test
3.Can be grouped as a life test.
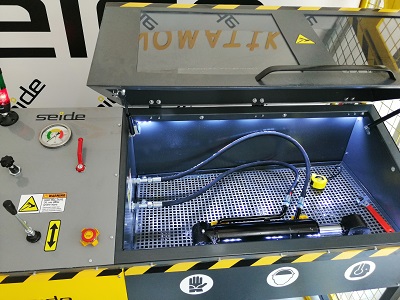
Pressure and internal leak tests should be performed in 100% period, life test should be done on a sample basis. Thanks to the pressure and internal leak test, these flaws can be seen at the first moment in the cylinder; · Whether the impermeability elements are damaged during assembly, · Whether there is internal leakage in the cylinder, Axial defect in the cylinder, · Whether there is overheating in the cylinder, • Whether the sleeve and connection elements are damaged at the desired test pressure · Whether or not the cylinder working stroke is correct. If there is rolling in the cylinder, it ensures that important data is collected, such as whether the rolling mechanism of the roller is working or not. life tests, on the other hand, respond to whether or not all cylinder elements provide the desired working life.

BASIC DESIGN ACCOUNTS AND NEW TECHNOLOGIES Symbols:
P: WORKING PRESSURE (BAR)
F: PRESSURE FORCE (daN)
A: AREA (cm2) A ': AREA (cm2)
D: PIPE INNER DIAMETER (mm)
d: ROD DIAMETER (mm)
h: STROK (mm)
t: STROK COMPLETION TIME (sec)
V: STROK VOLUME (lt)
v: STROKE SPEED (m / s)
?: VOLUME EFFICIENCY (0,90 - 0,95) Qth: THEORETICAL FLOW (lt / min)
Q: REAL FLOW (lt / min)
K: BENDING LOAD (kg)
Fç: MAXIMUM WORKING LOAD (kg)
Sk: FREE SPRING LENGTH (cm)
E: ELASTICITY MODULE (kg / cm2)
J: INTERMISSION MOMENT (cm4)
Q: SAFETY COEFFICIENT (2.5-3 for buckling)
6.1.1. Cylinder Thrust Force Calculation
F = PxA (kg) A = pxD2 / 4x100 (cm2) 6.1.2.
Cylinder Pulling Force Calculation
F = PxA 'A' = p (D2 -d 2) / 4x100 (cm2)
6.1.3. Cylinder Piston Speed Calculation
v = Q / Ax6 (m / sec) (ITMEDE) v = Q / A’x6 (m / sec) (AT PULL)
6.1.4. Cylinder Stroke Completion Time Calculation
t = Axhx6 / Qx1000 (sec) (in ITMEDE) t = A’xhx6 / Qx1000 (sec) (IN DRAWING)
6.1.5. Buckling Account
K = p2 xExJ / S2 k J = p d4 / 64 E = 2.1x10⁶ (FOR STEEL) Fç = K / S Note: The sk cylinder will be selected based on the connection type.
6.2 New Technologies
In order to protect the NIKROM 350 cylinder rods against corrosion and to obtain a slippery surface and reduce friction, the outer surfaces are protected with various coatings. Chrome; After grinding by electrolysis, the surface of the rod is coated between 20-50 microns according to the working conditions. However, in extremely humid environments, such as mines, harbors, etc. It was found that chromium did not perform very well. For this reason, manufacturing companies have been in various searches. Although it is not used in our country, nickel + chrome plated shafts are widely used as an alternative to chrome plated shaft in the world.
Sectors Used · Chemical production facilities, · Oil and gas processing stations, · Transportation vehicles, · Underground construction, · Agricultural machinery, · Military vehicles, · Airplanes, · Wind power plants, 0 200 400 600 800 1000 1200 K oro zy D ay anim S ati Hard Chrome Stainless Steel 420 - 431 chrome plated Nichrome 350
Thicknesses and Surface Quality Nickel thickness Chrome Thickness Surface quality> 30 mm> 20 mm Ra <= 0.2 mm Tolerances Diameter Flatness Eccentricity ISO f7 0.1mm / m 50% f7's Nichrome 350 Composition Micro-Cracked Chrome Steel Anti-corrosion Anti-Nickel Coated Shape 9. Manufacturing Dimensions Standard length 6100 + 100/0 mm Maximum 6500 + 100/0 mm Length after F130 6100 + 1000 mm 2003 III. NATIONAL HYDRAULIC PNEUMATIC CONGRESS AND EXHIBITION 114 Protection Against Corrosion Warranty ISO 9227NSS ISO 9227NSS ASTM B 117 ASTM B 287 Salt Test in Environment with Normal Decay (1000 hours) Salt Test (350 hours)


